Hacking the Lacie d2 Network 2
Description on how to install Debian on the Lacie d2 Network 2 NAS and how to overcome the possible 2GiB hard disk limit.
Specs
- Marvell Kirkwood 88F6281: Feroceon 88FR131 rev 1 (v5l) @ 1.2 GHz
- 256 MB RAM
- Only 512 kByte serial flash (stores bootloader and its config)
- One internal SATA, one external eSATA port
- One USB 2.0 host port
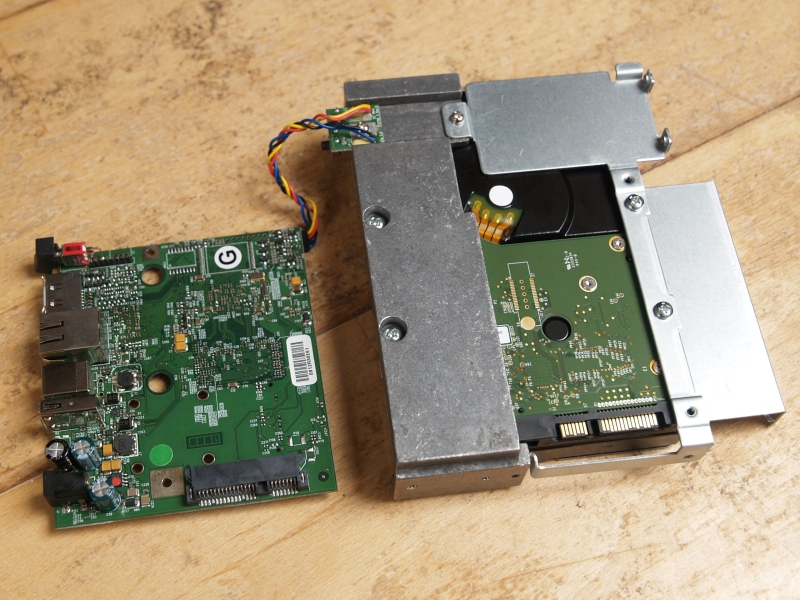
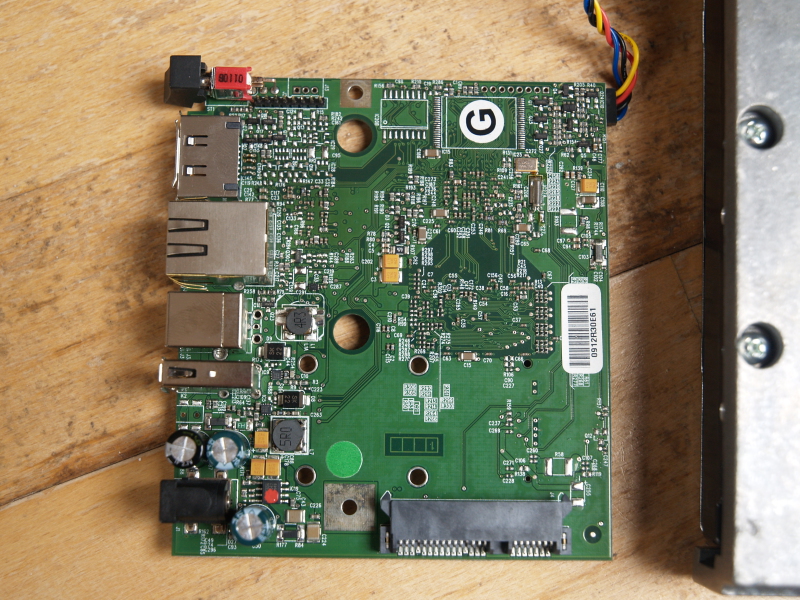
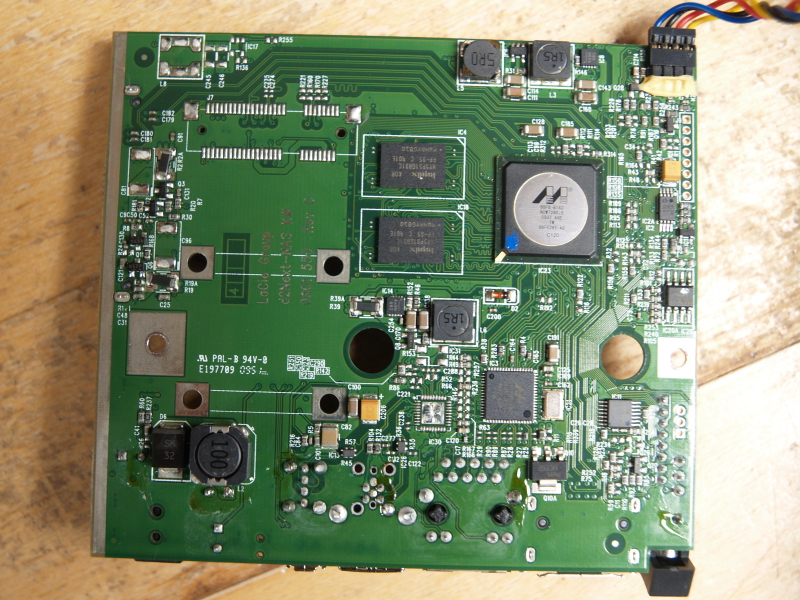
Pictures
Serial Port
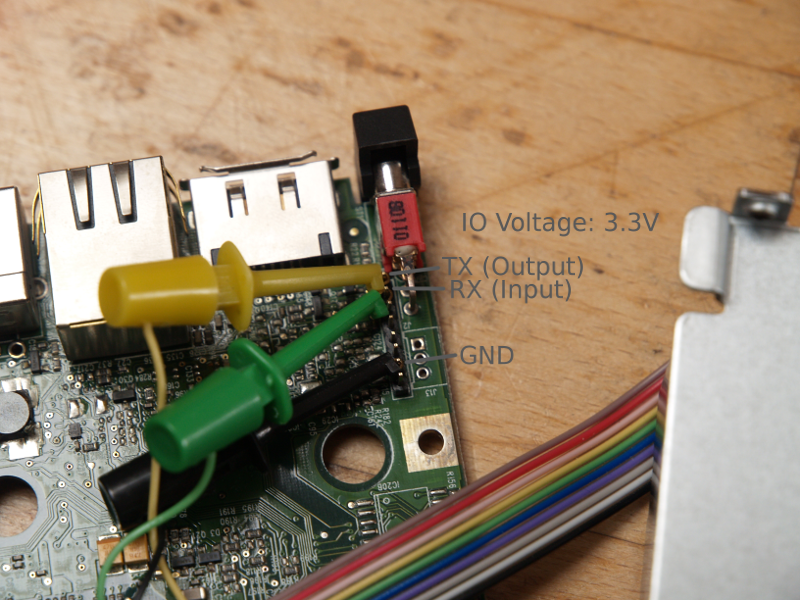
Note: The serial port uses 3.3V IO. Do not connect it to a serial port with 5V IO, as this might damage the device.
Installing Debian
Bootstrapping Debian
# mount /dev/vg_data_new2/nas_root /media/debian
# cdebootstrap --verbose --arch armel --foreign wheezy /media/debian http://ftp.debian.org/debian
P: Retrieving InRelease
[...]
P: Writing hosts
P: Writing resolv.conf
I: Second stage installer is available as /sbin/cdebootstrap-foreign or /sbin/init
To run the second stage, you will need qemu und binfmt-magic, see also http://wiki.debian.org/EmDebian/CrossDebootstrap#QEMU.2Fdebootstrap_approach:
# cp /usr/bin/qemu-arm-static /media/debian/usr/bin/
# DEBIAN_FRONTEND=noninteractive DEBCONF_NONINTERACTIVE_SEEN=true  LC_ALL=C LANGUAGE=C LANG=C chroot /media/debian/ /sbin/cdebootstrap-foreign
With the qemu-Method you can also easily chroot into the
installation and do things like setting the root-password:
# chroot /media/debian
# passwd root
You should also launch a getty on ttyS0 in you /etc/inittab:
T0:23:respawn:/sbin/getty -L ttyS0 115200 vt102
Pre-Built Kernel and Initrd
For your first tests and bootstrapping the device you can
use my pre-built files:
You can put them on tftp and boot like this:
tftpboot 0x00800000 uImage-3.5.0
tftpboot 0x01100000 uInitrd-3.5.0
setenv bootargs 'console=ttyS0,115200 root=/dev/mapper/vg_data_new2-nas_root rootdelay=5'
bootm 0x00800000 0x01100000
Building a Kernel
TODO
Preparing the Kernel and the Initramfs for Boot
The standard "vmlinuz" and "initrd.img" files need to be adapted for
U-Boot. The following is an example with a stock Debian kernel and initramfs:
$ mkimage -A arm -O linux -C none -T kernel -a 0x00008000 -e 0x00008000 -n "Linux 3.16.0-4" -d vmlinuz-3.16.0-4-kirkwood uImage-3.16.0-4
$ mkimage -A arm -O linux -C none -T ramdisk -a 0x00000000 -n initramfs -d initrd.img-3.16.0-4-kirkwood uInitrd-3.16.0-4
Building and Updating U-Boot
The Problem
The bootloader on my device used to be U-Boot with the following version string:
"U-Boot 1.1.4 (Dec 21 2009 - 16:55:45) Marvell version: 3.4.16 LaCie 1.3.9".
When trying to use a 3 TiB disk with a GPT (GUID Partition Table), the following happend:
Reset IDE:
Marvell Serial ATA Adapter
Integrated Sata device found
[0 1 0]: Enable DMA mode
  Device 1 @ 0 1:
Model: WDC WD30EZRX-00AZ6B0                     Firm: 80.00A80 Ser#:      WD-WCC070245558
            Type: Hard Disk
            Supports 48-bit addressing
            Capacity: 764436.4 MB = 746.5 GB (1565565872 x 512)


** Device 0 not available
GPT: last_usable_lba incorrect: %lX > %lX
get_partition_info_efi: *** ERROR: Invalid GPT ***
There are two things that can be seen: First, the disk is not properly identified.
It shows a size of only 746.5 GB. This is due to LBA addressing being limited to 32 bit in U-Boot (yes, even if it prints something about 48-bit addressing!).
There seems to be the CONFIG_SYS_64BIT_LBA flag missing in the U-Boot build.
The second problem is actually caused by the first problem. U-Boot supports GPT, but it refuses to use it, because some sanity checks go wrong (caused by
the incorrectly detected size of the disk).
I tried several things, including a hybrid partition table (MBR and GPT), but U-Boot could not be easily fooled.
The only thing that helped was rebuilding and re-flashing U-Boot.
Now this is the dangerous part. If something goes wrong here, it will brick the device (although it might be rather easy to re-flash the serial flash, if you have the equipment). If something goes wrong, do not blame me, do not cry - you have been warned!
Building U-Boot
The process of building U-Boot is inspired by
http://www.cyrius.com/debian/kirkwood/sheevaplug/uboot-upgrade/,
however here is how I did it:
$ git clone git://git.denx.de/u-boot-marvell.git u-boot-marvell.git
$ cd u-boot-marvell.git
$ make mrproper
$ make d2net_v2_config
$ export CROSS_COMPILE=<PATH_TO>/arm-2010q1/bin/arm-none-eabi-
[Edit file include/configs/lacie_kw.h and insert the CONFIG_SYS_64BIT_LBA]
$ make u-boot.kwb
If everything goes right, this u-boot.kwb is the file you
later want to flash.
If you prefer not to patch and build it yourself, you can also grab a copy
of my u-boot.kwb (MD5-Sum: 9eb6636c1691dcbc7d5a18e95e84bf35).
Backing up the Flash
If you have a running Linux system for your d2, it is possible to back it
up:
# dd if=/dev/mtdblock0 of=mtdblock0
1024+0 records in
1024+0 records out
524288 bytes (524 kB) copied, 0.826058 s, 635 kB/s
~# ls -lh mtdblock0
-rw-r--r-- 1 root root 512K Jan  1 00:02 mtdblock0
If things go wrong, you can in theory use this file to restore the
original bootloader. In practice, you will need the equipment to write
to the flash chip and might even have to desolder it - keep that in mind.
Also, you might want to have a copy of printenv lying around,
especially as it contains your MAC-Address, which you will have to type
in later.
Marvell>> printenv
[...]
ethaddr=00:D0:xx:xx:xx:xx
[...]
Flashing the new Bootloader
Did I already warn you that this may brick your device? Okay …
this may brick your device, only do it if you know what you are doing.
I loaded the new bootloader via tftp. You can also load it from somewhere
else, like USB or an attached hard disk:
Marvell>> tftpboot 0x0800000 u-boot.kwb
Using egiga0 device
TFTP from server 10.4.50.5; our IP address is 10.4.50.165
Filename 'u-boot.kwb'.
Load address: 0x800000
Loading: ####################################################
done
Bytes transferred = 264940 (40aec hex)
Okay, the new loader is now in RAM, now the dangerous part:
Erasing the flash and writing the new code to it:
Marvell>> sf protect off
Marvell>> sf erase all
Marvell>> sf write 0x800000 0 0x40aec     # Note the size specified in HEX as indicated above!
Marvell>> sf protect on
If you are lucky, everything went fine. After typing reset
you should see something like this:
U-Boot 2013.04-rc1-11371-g90639fe-dirty (Jun 01 2013 - 16:02:09) D2 v2

SoC:   Kirkwood 88F6281_A0
DRAM:  256 MiB
WARNING: Caches not enabled
SF: Detected MX25L4005 with page size 64 KiB, total 512 KiB
*** Warning - bad CRC, using default environment

In:    serial
Out:   serial
Err:   serial
Error: failed to read I2C EEPROM @50
Net:   egiga0
Warning: failed to set MAC address

88E1116 Initialized on egiga0
Hit any key to stop autoboot:  0
You should now set the MAC-Address and configure everything to your needs.
d2v2> setenv ethaddr 00:D0:xx:xx:xx:xx
d2v2> saveenv
After that upgrade the external eSATA was no longer recognized by
the Bootloader (gave me quite a headache, as I thought no SATA
at all was available). However the internal port is recognized and
will now also detect my 3GiB disk:
d2v2> ide reset

Reset IDE: Bus 0: ...........OK
  Device 0: Model: WDC WD30EZRX-00AZ6B0 Firm: 80.00A80 Ser#:  WD-WCC070245558
            Type: Hard Disk
            Supports 48-bit addressing
            Capacity: 2861588.4 MB = 2794.5 GB (5860533168 x 512)
Note: the "missing" eSATA port only affects the bootloader. Linux will still
recognize it and can still use it.
Hardware Crypto Acceleration
There is hardware crypto acceleration, but it's not that big of a difference
(or my test is flawed):
# cryptsetup luksOpen /dev/vg_data_new2/media crypt_media
# hdparm -t /dev/mapper/crypt_media

/dev/mapper/crypt_media:
 Timing buffered disk reads:  24 MB in  3.21 seconds =   7.47 MB/sec

# cryptsetup luksClose crypt_media
# modprobe mv_cesa
# cryptsetup luksOpen /dev/vg_data_new2/media crypt_media
# hdparm -t /dev/mapper/crypt_media

/dev/mapper/crypt_media:
 Timing buffered disk reads:  26 MB in  3.14 seconds =   8.28 MB/sec
|
